Welcome to Handel on the Law Attorney Directory! Our website provides an Attorney Directory with tons of customization features and potential. To utilize these features, first Create or Claim your listing.
Create or Claim a Listing
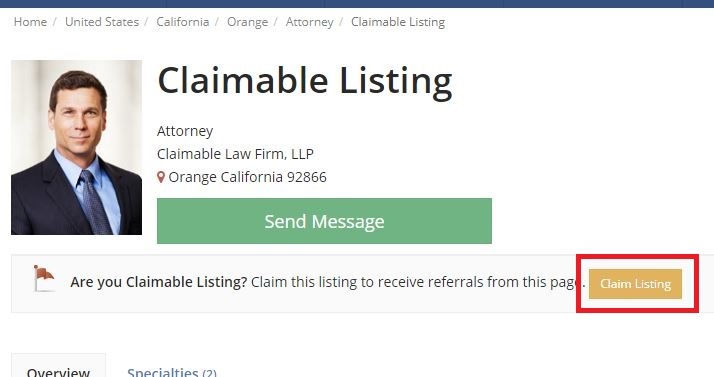
In order to fully customize your listing, you must first create or claim a listing. Your attorney listing may have already been added by our administrators. Start by searching for your name in our Attorney Directory. If a listing comes up, you can claim the listing by clicking on it and using the button titled “Claim Listing”.
A Listing Ready to Be Claimed
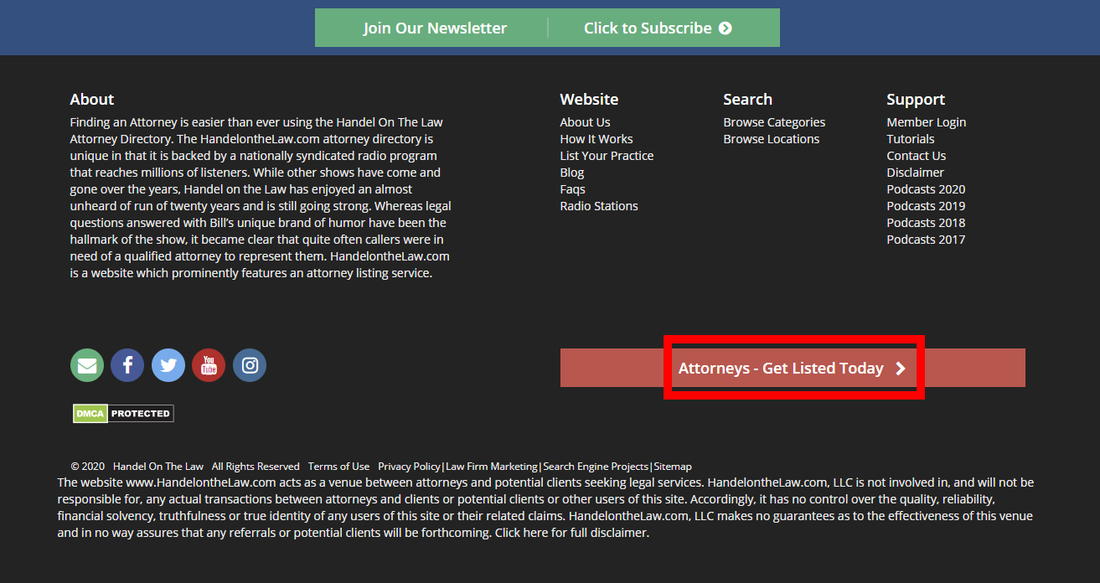
If there is not already a listing for you, you can easily create one with the button in the main menu titled “Join Today” or the button at the top or bottom of the page titled “Attorneys – Get Listed Today”.

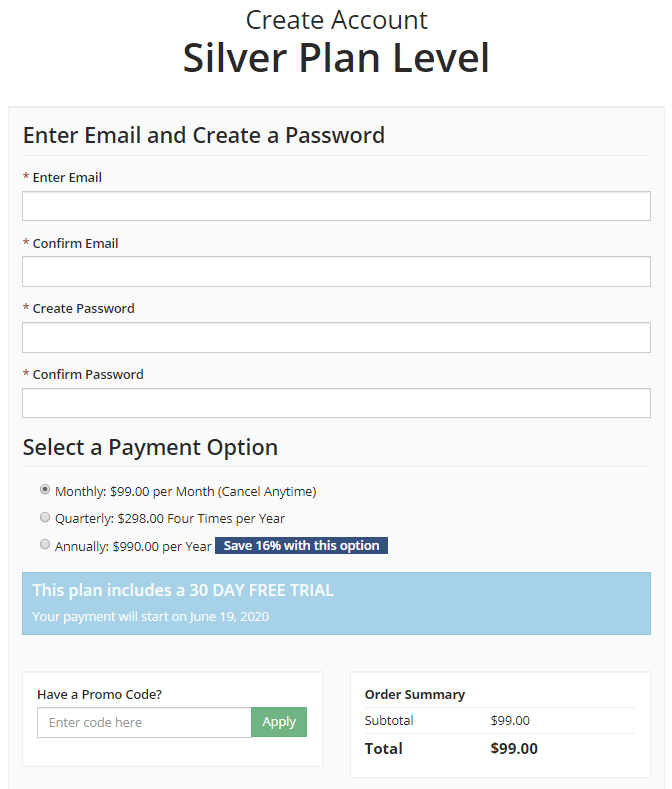
How to Create a Listing
Once you’ve chosen an account level, click the green button titled “Create Listing” to purchase your subscription and get started!
Creating a Basic Listing
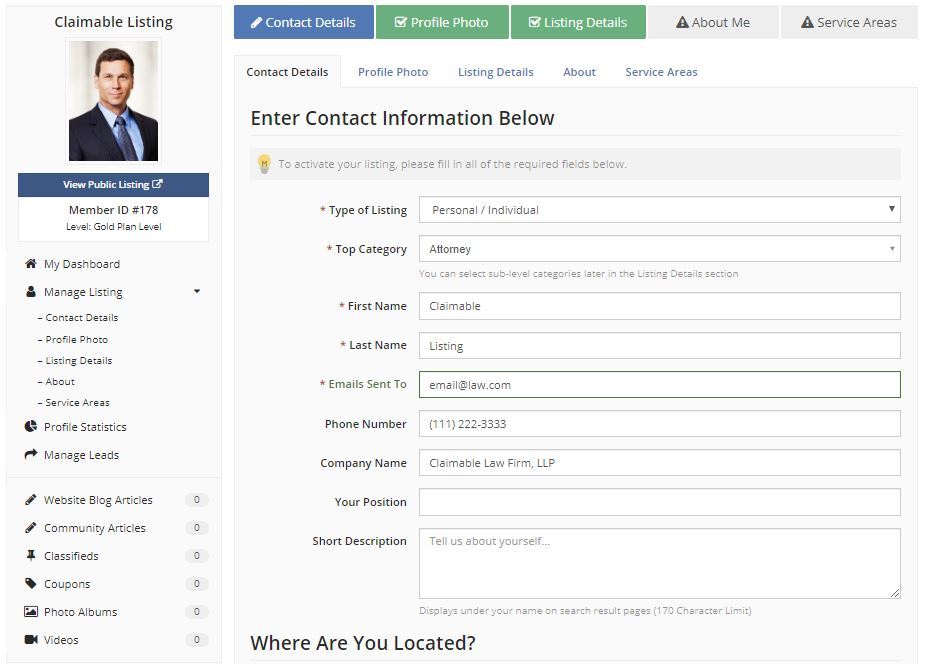
Once you have a listing, its time to get started maximizing its potential! Once you log in, you will see something like this:
Start by filling out your contact information.
- Make sure you set the type of listing to “Personal/Individual” or else the listing will represent your firm instead of yourself.
- Enter your first and last name you want to show up in search results.
- Enter an email that will be checked regularly. This is where emails regarding leads will be sent.
- Enter a phone number for your firm. If you want your firm’s Yelp rating to show up on your profile, use the same number listed under your Yelp Business Page.
- Enter your firm/company name. This will show up next to your name in search results.
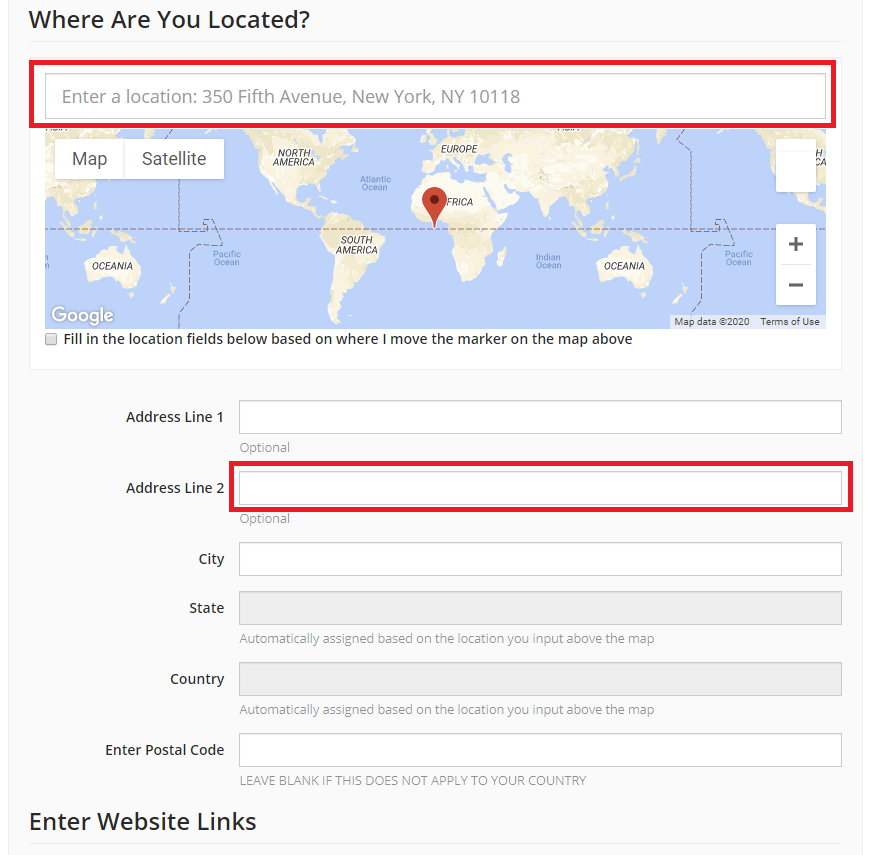
Proceed to the section titled “Where Are You Located?”
- Start typing your practice location in the bar above the map. Google Maps will help you automatically find the correct address.
- Once you’ve selected the correct address, the only thing left to do is fill out the Office/Suite number in the bar for “Address Line 2".
The last pieces of contact information are totally optional but help keep your listing current and provide other ways for customers to interact with your profile and get more information, see your results, etc.
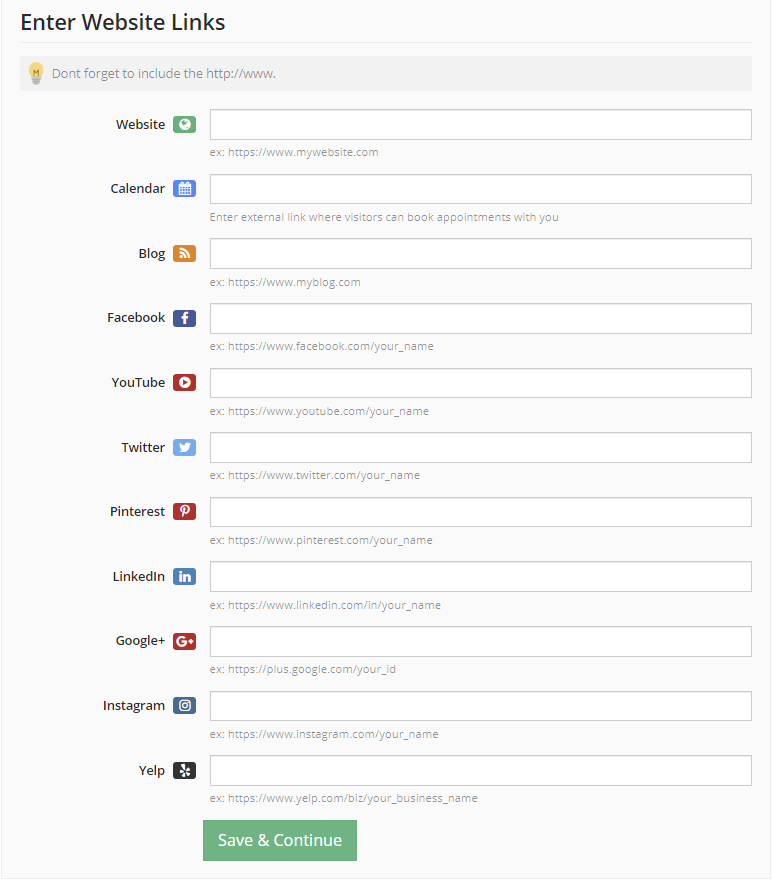
Scroll down the section titled “Enter Website Links”.
- Here you can add all the links to your website, blog, Facebook page, YouTube channel, Twitter feed, and Instagram feed.
Once you are done, click the green button titled “Save & Continue” to save your work and proceed to the next section.
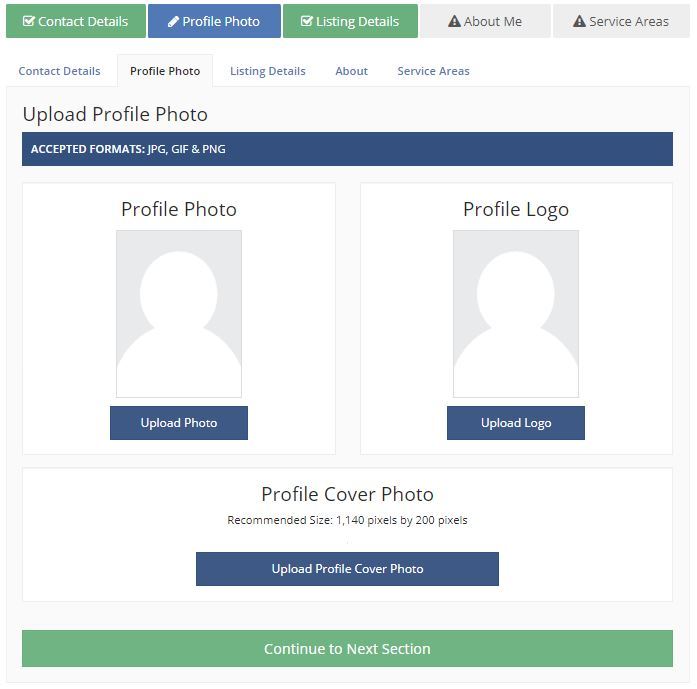
Click the button “Upload Photo” to upload your profile picture. Click “Choose Image” to select an image from your computer.
Choose a high-resolution photo and use the mouse wheel to shrink or enlarge the picture to show off your beautiful face. You want to choose a photo that is professional and welcoming so that clients feel comfortable when they are viewing your profile. You can also upload an optional logo for your firm. When you are done, click “Continue to Next Section”.
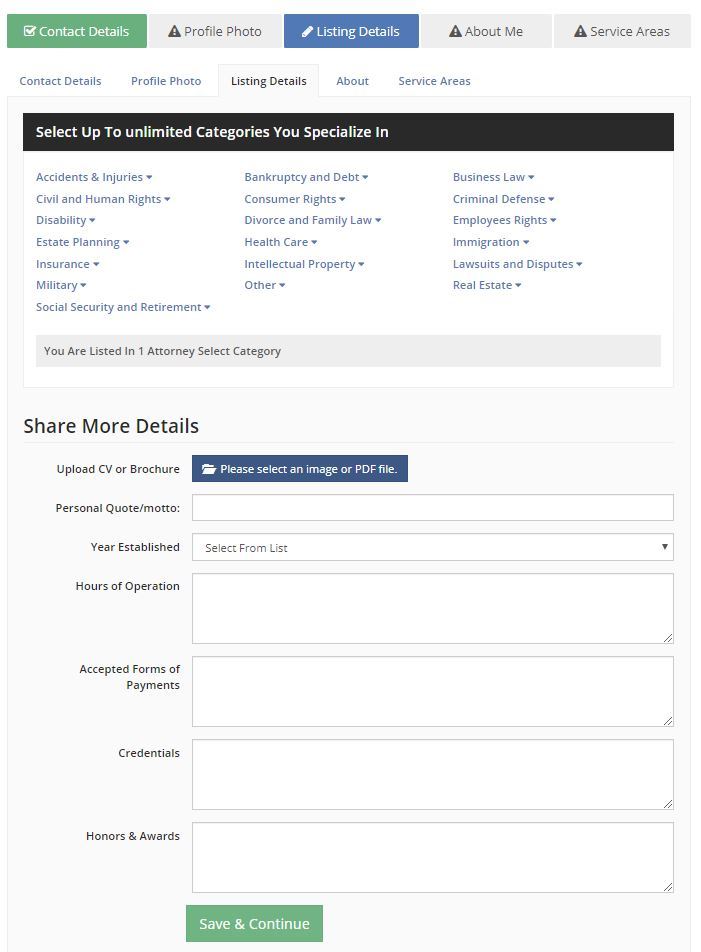
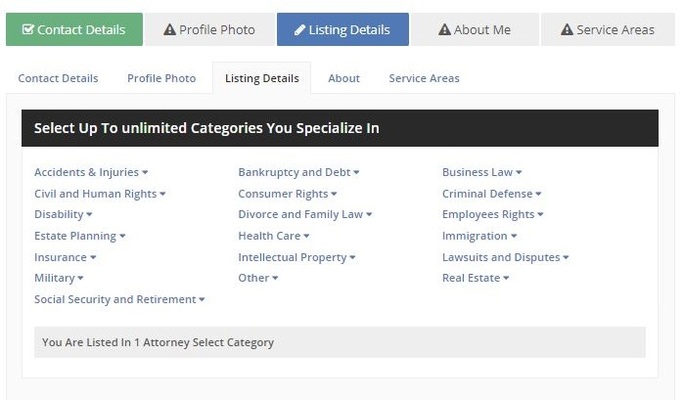
This next section is very important. Depending on your membership plan level, you can select from 2 to 30 practice areas that you specialize in. This is extremely valuable as users can search for attorneys based on practice areas and can contact you about specific areas you specialize in.
Use the dropdown menus to select the practice areas you specialize in. Try to pick the specialties you do best and are known for. If you cannot find a specialty you want, contact the Handel on the Law Attorney Directory team and we can add them in for you. Here you can also add some optional fields to make your profile stand out:
- You can add your personal quote or motto, which will show at the top of your listing
- You can add the year your firm was established, and upload a CV to showcase your experience
- You can add the hours your firm is open
- You can include all the forms of payment that your firm accepts
- We highly recommend adding your Bar Association Credentials to show your credibility. You can use this area to showcase your Bar Association admission dates and numbers.
- If you have any honors or awards, list them under “Honors & Awards”
When you are finished, click the green button titled “Save & Continue” to proceed to the next section.
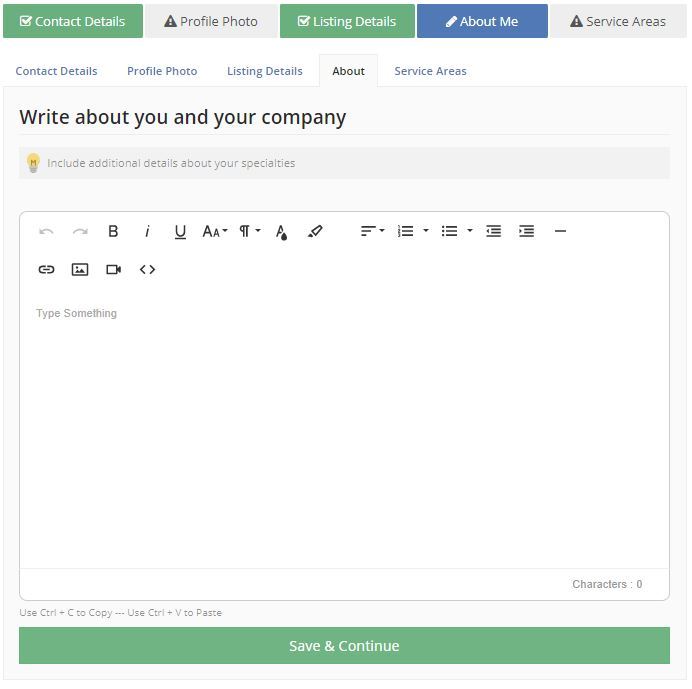
The following section is the “About Me” tab.
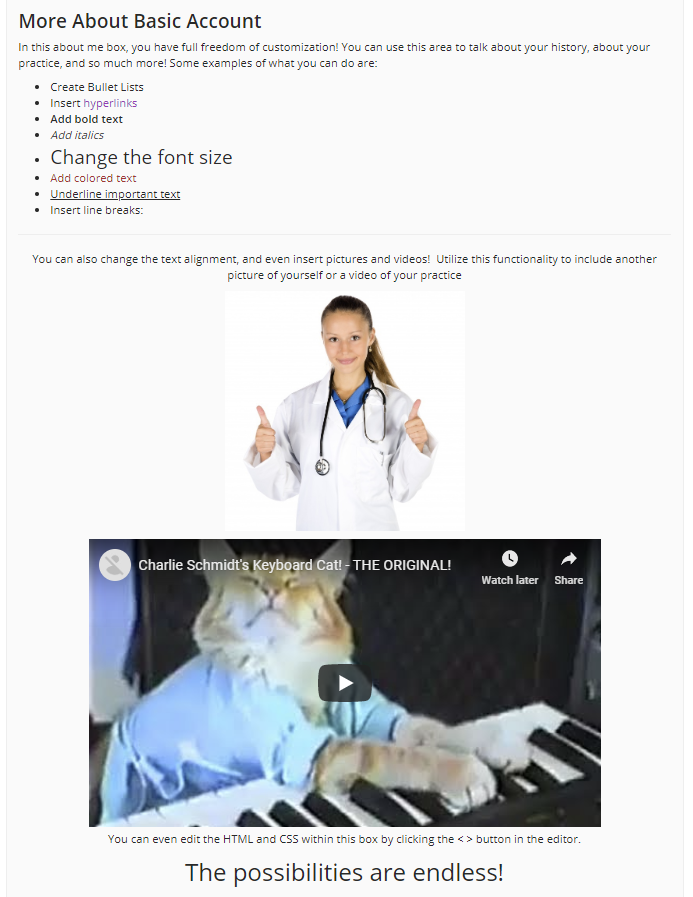
In this box, you have the full freedom of customization. You can simply copy your “About Attorney ______” page from your website if you already have one, or you can have fun with all the functionality the box provides. Some things you can do with this editor box include:
- Have full control of the font size, style, and color
- Have full control of the paragraph style
- Insert bullets and lists
- Insert vertical lines to break up sections
- Insert links to web pages and videos
- Insert additional pictures
- Fully customize the HTML and CSS of the box content
Here is an example of how the About Me tab will look on your listing:
When you are done, click the green button titled “Save & Continue”.
The last thing you can add to your listing is Service Areas. Depending on your membership level, you may add up to 10 service areas. For example, a Platinum Plan Listing can list up to 10 service areas including states, counties, cities, and zip codes. To add a service area, type a state, county, city, or zip code into the bar and select one that you are looking for. Then, click the green button titled “Add +” to add the area that you want to list.
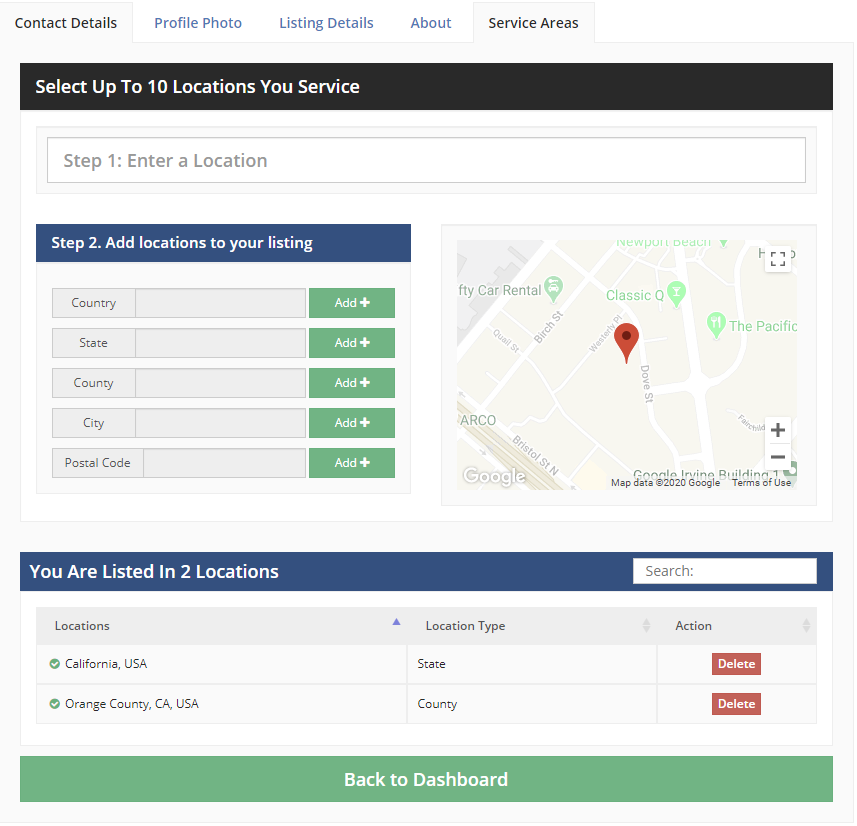
When you are done, click the green button titled “Back to Dashboard” to go back to your member dashboard.
To view your live listing, click the blue link under your profile picture titled “View Public Listing”.
Congratulations! Your profile is now complete and will stand out when compared to an Unclaimed listing. Make sure to come back and update your listing if your location or contact details change.

